New Jira Issue from Selected Text
Create a new Jira Issue starting with the selected text as the description
by @pixies
How to Use
Create a Jira ticket from any webpage using the right-click menu. Auto-fill the ticket summary with highlighted text.
Activate the Blueprint
-
Activate this . If you're not logged into PixieBrix or you have not previously created a PixieBrix account, you'll be prompted to do so before continuing the activation flow for this .
-
Once you are logged in, configure the Jira Integration by clicking Add New in the Integrations dropdown and entering your Atlassian API token and project URL. You can get your Atlassian API token at https://id.atlassian.com/manage-profile/security/api-tokens, and the URL of your project follow this format: example.atlassian.net
-
Finish activating this by clicking "Activate" in the Extension Console.
Try it Out
-
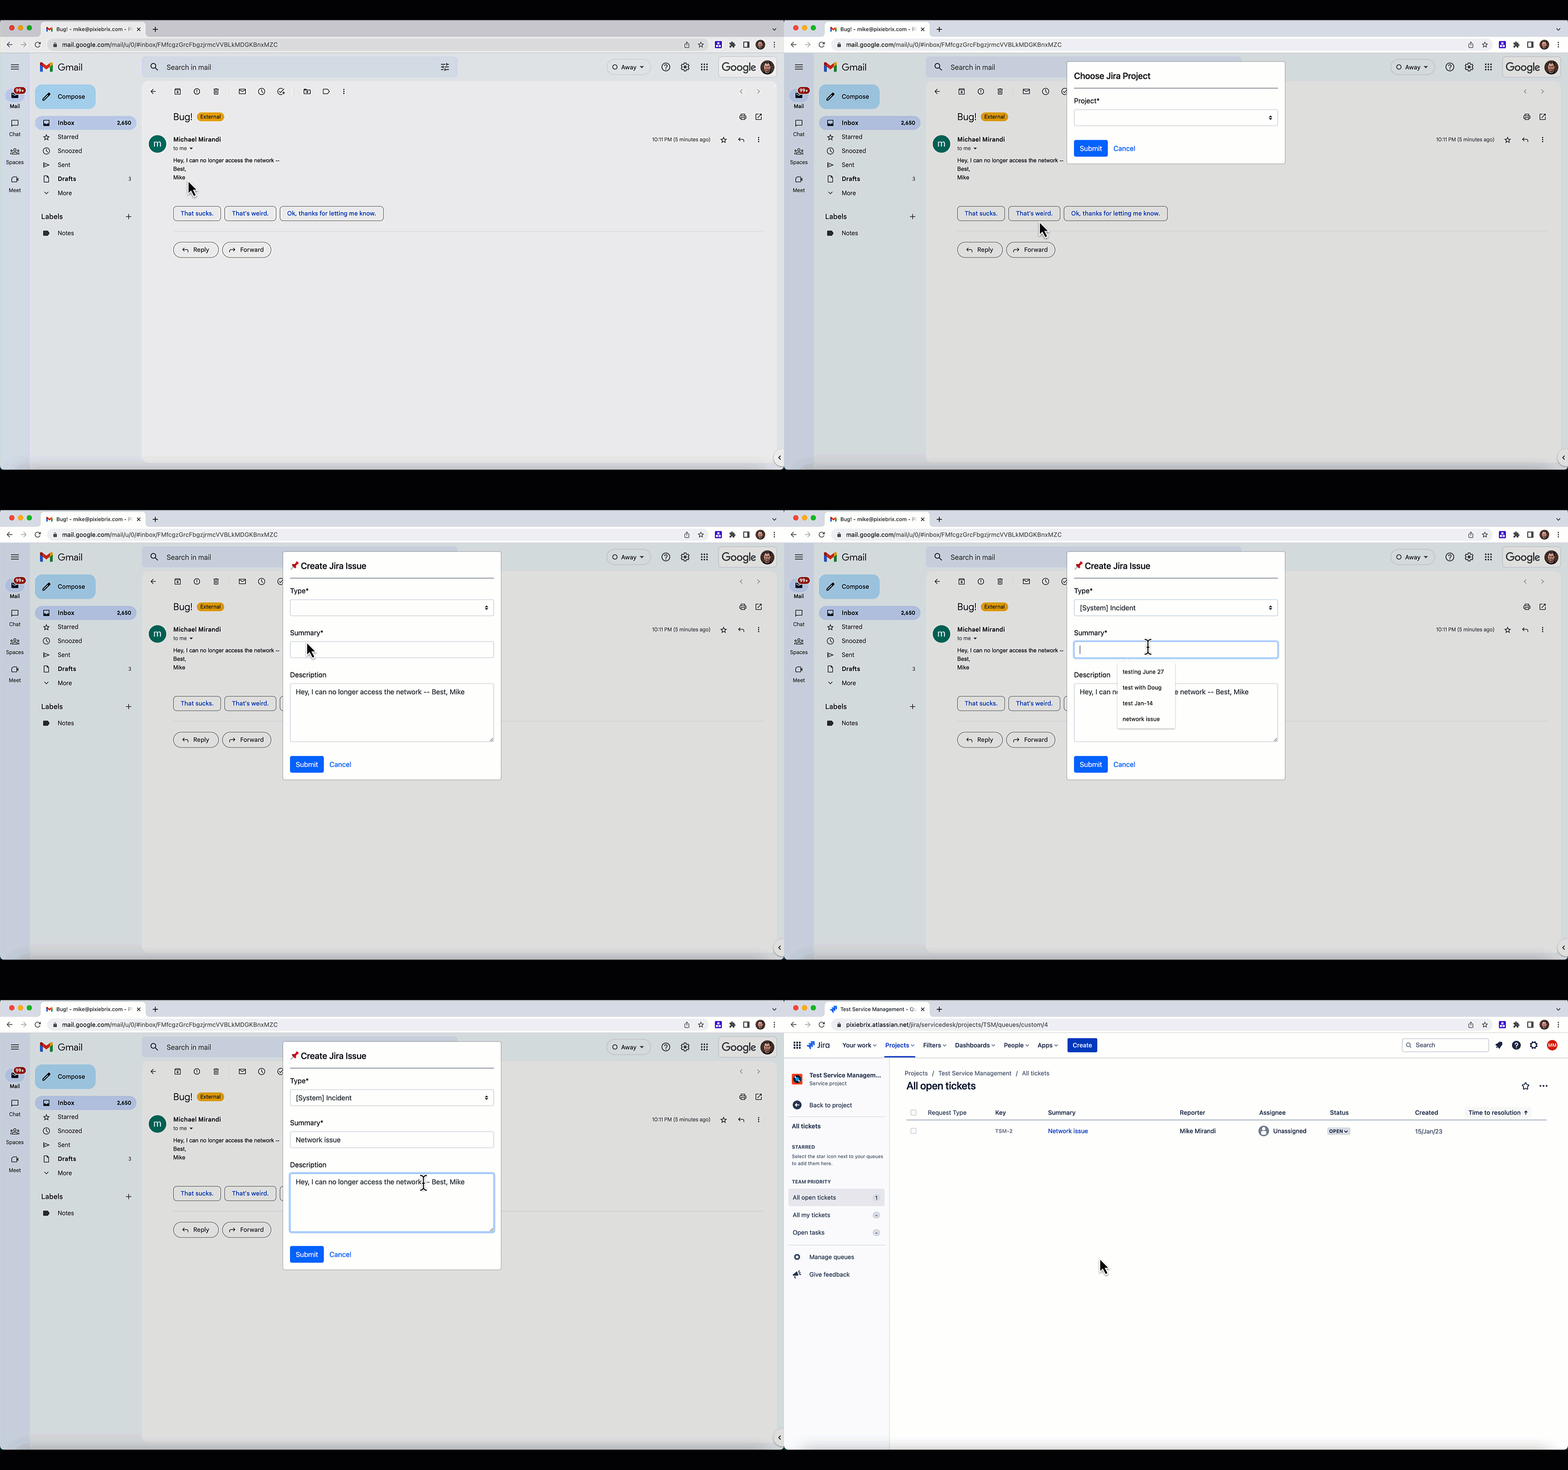
Go to any page from where you might want to create a Jira ticket. This could be Gmail, a community forum, etc. Right-click and you should see "Create jira Issue: 'selectionText'" in the context menu. Click it.
-
Choose the Jira project where you would like to create the ticket.
-
Fill out the Type, Summary, and description, and click Submit. PixieBrix will create a Jira ticket with the information you entered.
Endless Possibilities
This is just the beginning! Once you activate your , the possibilities are endless. With PixieBrix, you can customize any to meet your needs or even build something entirely new. If you run into any trouble and need some friendly support or if want to share your creations with the world, join our PixieBrix Slack Community.
